LangFlow + MCP + IBM Watsonx Orchestrate Integration Guide
This guide walks you through setting up LangFlow, exposing it via ngrok, and integrating it with IBM Watsonx Orchestrate using the Model Context Protocol (MCP).
Prerequisites
- macOS (commands are Mac-specific)
- Python 3
- Homebrew package manager
- IBM Watsonx Orchestrate account
- ngrok account
Part 1: Environment Setup
1. Create Python Virtual Environment
python3 -m venv myenv
source myenv/bin/activate
2. Install LangFlow
brew install langflow3. Install ngrok
brew install ngrok4. Configure ngrok
- Create an account at the ngrok dashboard and follow macOS setup instructions.
- Generate an authentication token from your dashboard.
- Add the token to ngrok:
ngrok config add-authtoken <YOUR_AUTHTOKEN>Part 2: Running LangFlow
5. Start LangFlow Server
cd ~/langflow-project
source myenv/bin/activate
langflow run --host 0.0.0.0 --port 7860
6. Expose LangFlow via ngrok
ngrok http 7860Part 3: Configure LangFlow API Access
7. Get MCP Server URL
- Navigate to your flow's page in LangFlow.
- Click Share, then MCP.
- Copy the URL and save it.

8. Generate LangFlow API Key
- Click on Settings in LangFlow.
- Select Make API Key.
- Name and save the key.
9. Get Orchestrate Credentials
- In Orchestrate, click Settings.
- Click Generate API Key and save it.
- Copy the Service Instance URL.
Part 4: Connect to IBM Watsonx Orchestrate
10. Install Orchestrate SDK
pip install --upgrade ibm-watsonx-orchestrate11. Add Orchestrate Environment (PS. get rid of <> 😎)
orchestrate env add -n <environment-name> -u <service-instance-url> --type ibm_iam --activate12. Import LangFlow as MCP Server
orchestrate toolkits import \
  --kind mcp \
  --name langflow_mcp \
  --description "Langflow MCP Server (hosted via SSE)" \
  --package "mcp-proxy" \
  --language python \
  --command "uvx mcp-proxy <YOUR-NGROK-URL> --headers x-api-key <YOUR-LANGFLOW-API-KEY>" \
  -- tools "*"
13. Verify Installation
orchestrate toolkits listPart 5: Create and Deploy Agent
14. Create New Agent
- In Orchestrate, open Agent Builder.
- Click Create Agent, name it, and create.
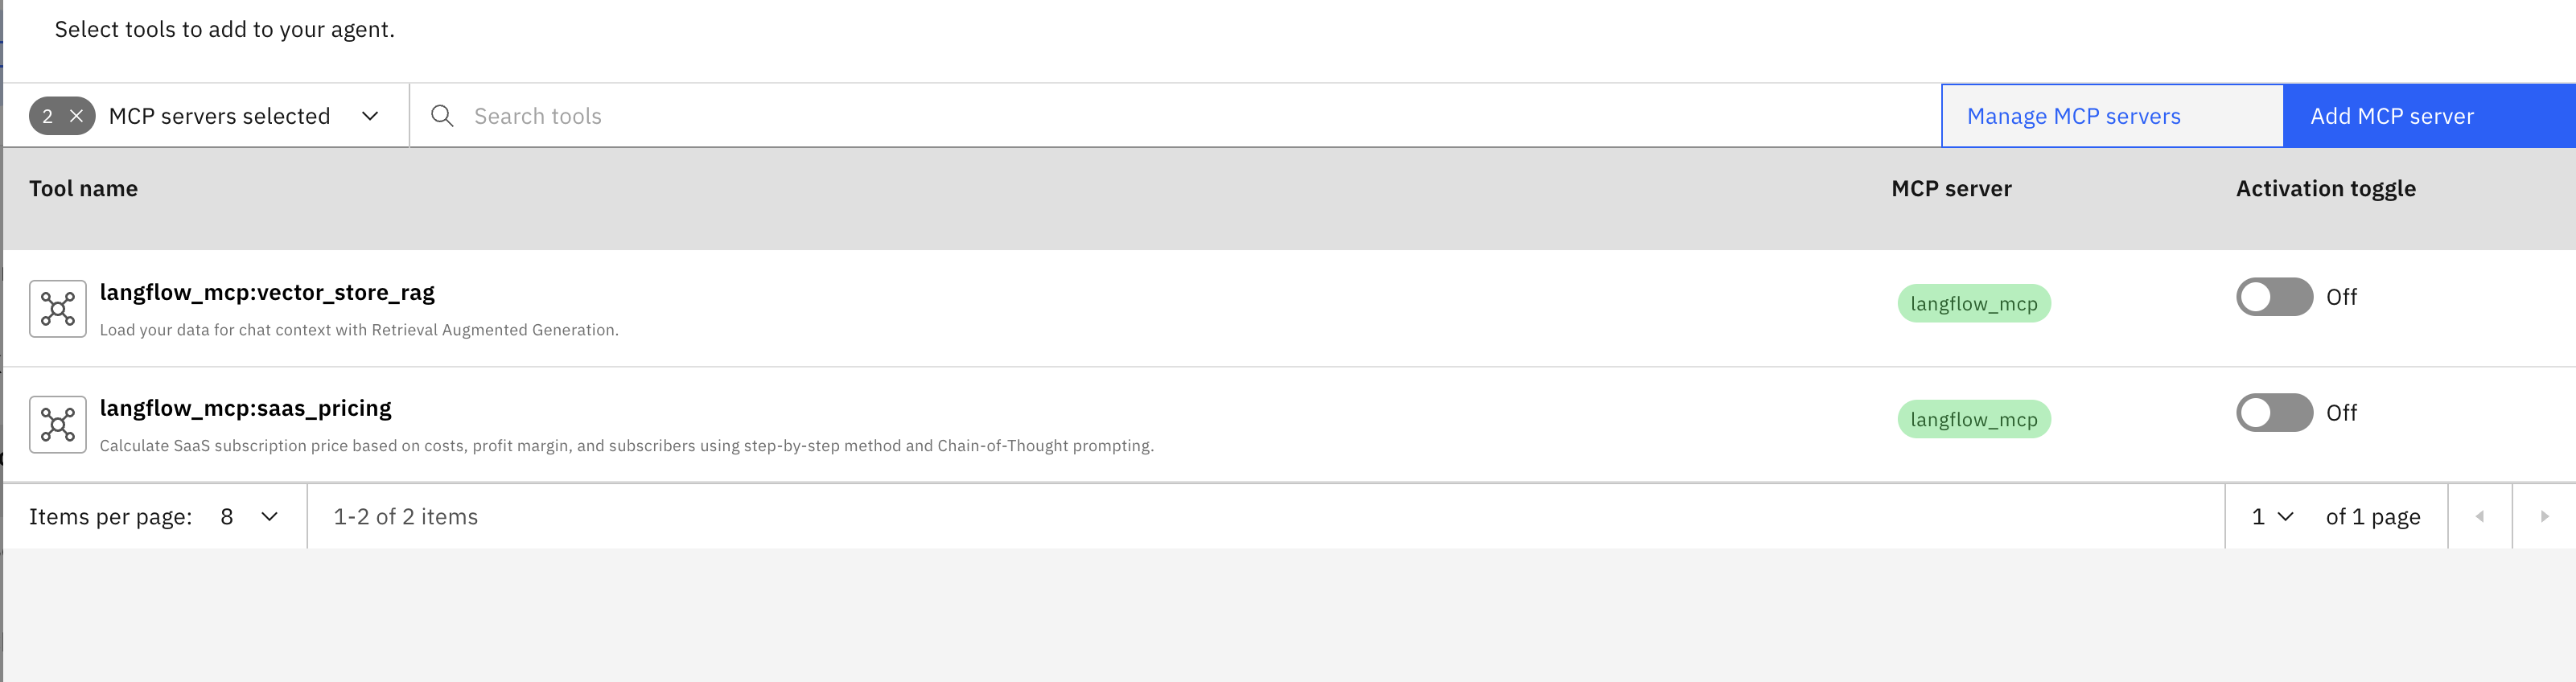
15. Add LangFlow Flows to Agent
- Click Toolset → Add tool → Add from file or MCP server → Import from MCP server.
- Click Select MCP server Select your LangFlow MCP server.
- Enable the flows you want by turning on the Activation toggle.
16. Deploy Agent
Click Deploy (top right).
Part 6: Testing
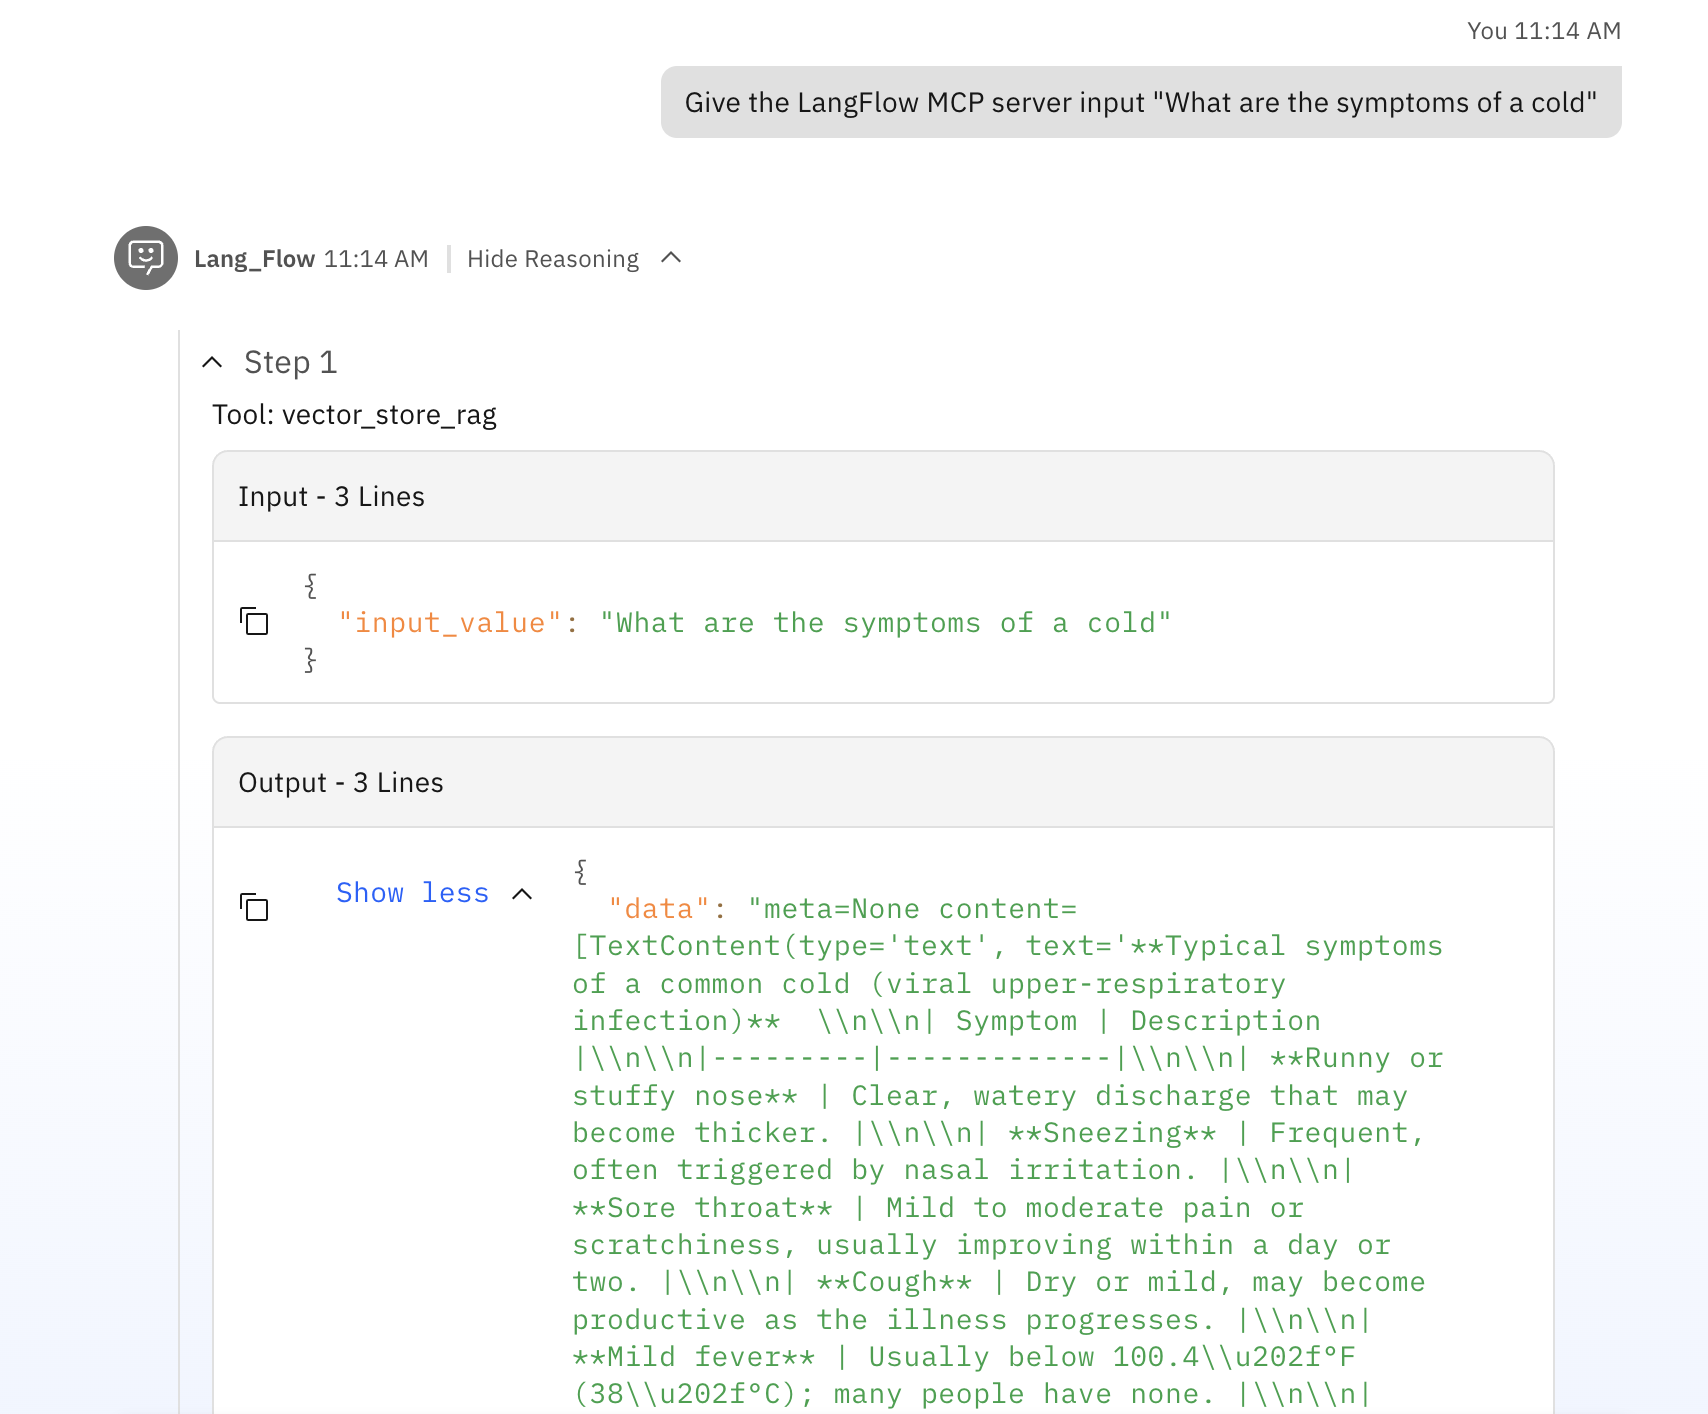
17. Run Your Flow
- Ensure flow has both input and output text components.
- Test the agent in Orchestrate.
- "vector_store_rag" is name of the flow in LangFlow.
Important Notes
- Keep LangFlow server running.
- Keep ngrok tunnel active.
- ngrok URL changes unless you have a paid plan.
- Save keys securely.
Troubleshooting
- Verify LangFlow and ngrok are running.
- Check API keys.
- Ensure proper input/output components.
- Test ngrok URL in browser.
Security Considerations
- Keep API keys confidential.
- Use environment variables when possible.
- For production, consider alternatives to ngrok free tier.